A side exterior view of historic Ford’s Theatre, a three-story brick building with five arched windows on the second and third floor. The bottom floor is white and has five arched entryways.
Exterior view of Ford’s Theatre National Historic Site and the new Ford’s Theatre lobby. Photo © Maxwell MacKenzie.

Art & Oratory

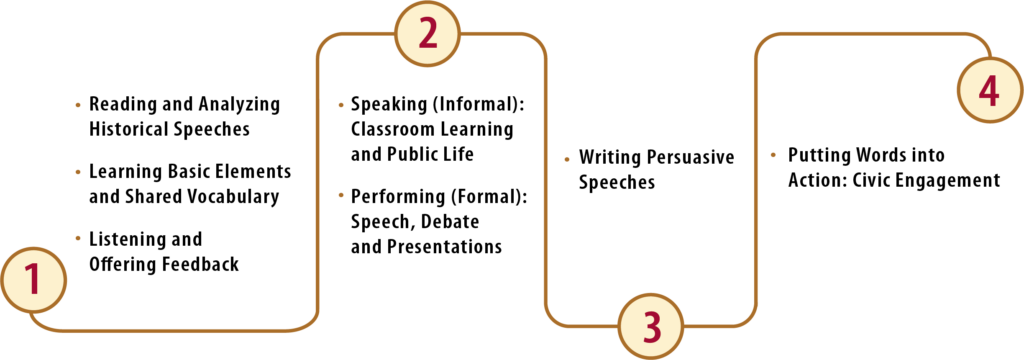
This lesson sequence asks students to choose a historical speech to analyze, to research the context of the speech, and to relate those themes to today.

The students will then create art visual representations to demonstrate their understanding. This lesson plan is scheduled to last for eight instructional periods of 45-minutes. It can be shortened by assigning some of the research as homework or lengthened by going into more depth. This sequence can be easily adapted to focus on a particular historical time period or historical theme such as civil rights, environmental issues, slavery, etc.

Common Core Standards

CCSS.ELA-LITERACY.CCRA.R.2

Determine central ideas or themes of a text and analyze their development; summarize the key supporting details and ideas.

LEARNING OBJECTIVESIdentify key events that led to the creation of the chosen speechIdentify important contributions of the speakerAnalyze an historical speech in order to understand its themes and purposesConnect the historical speech to events of todayProduce a text-based art piece that communicates the connection of the speech to today’s events
GUIDING QUESTIONSWhat inspires someone to speak out?How does the past connect to the present and future?
PREPARED BYGRADELENGTH
 KRISTA MCKIM SECONDARYNINE CLASS PERIODS

Classroom Activities

  • Lesson Activity One: Research
    Students choose a speech that interests them and research the context of the speech.
  • Lesson Activity Two: Textual Analysis
    By using annotation techniques, students gain an understanding of the speech’s theme(s).
  • Lesson Activity Three: Timeline Creation
    Using a timeline, students find events related to their speech. Drawing on history and the speech itself, students infer the speaker’s intent.
  • Lesson Activity Four: Symbolism and Art Piece Examples
    Students identify visual symbols that relate to the theme in their speech and look at examples of text-based art.
  • Lesson Activity Five: Art Creation
    Students create their own text-based art piece.
  • Lesson Activity Six: Label Examples and Creation
    Students will compare art exhibit labels and then write their own.
  • Lesson Activity Seven: Gallery Walk
    Students share their art pieces and reflect on what they’ve learned.

Lesson Activity One

Research

Students will begin by choosing a speech that interests them. If you want to focus on a particular historical theme or time period, give the students criteria in making their choice or create a list of speeches for them to choose from.

The American Heritage Book of Great American Speeches for Young People is a great starting point for choosing speeches. The editor, Suzanne McIntire, has done an excellent job shortening major American speeches to make them more manageable for students. I have found the book lacking in speeches by women, so I supplement with Denise Graveline’s exceptional collection of speeches by women on her website.

Students will then research their orator, identifying 10 facts that everyone should know about him or her. 

We like the following resources: EBSCO Student Research Center; Britannica School, or ESBCO Kids Search because they are constantly updated and most of them allow the student to change the information based on their reading level.  See Student Resource Packet, p. 2

Next, students will research the event at which their speaker is presenting.  Students need to understand the context of their speech. The students identify five facts about the event that everyone else should understand. See Student Resource Packet, p. 3

Lesson Activity Two

Textual Analysis

Students will annotate their speech. To help students truly understand their speech, they need to annotate it. There are many different ways to annotate. It is important that they identity the theme of their speech at this point. See Student Resource Packet, p. 4

Three of my favorite resources on annotating are:

Lesson Activity Three

Timeline Creation

Students will create a Timeline. This activity requires students to reflect on how history may have influenced their chosen speech and orator, inspiring him or her to speak out, as well as identifying contemporary connections. Student can use the same research resources as they did in Day One, adding Newsela, SIRS Discoverer or Student Research Center Jr. These resources add more current events than the previously listed sites. See Student Resource Packet, pp. 5-6. The student timeline can be done by hand in the Resource Packet or electronically.

The Read Write Think website allows students to easily create a timeline and include pictures.  Northwestern University created a program that allows anyone to make a timeline for a website that can incorporate video.

Lesson Activity Four 

Symbolism and Art Piece Examples

Students will identify symbolism in art and poetry. Students will begin thinking about what symbols they can use in their art piece by looking at examples. See Student Resource Packet, p. 7.

Students will then compare text-based art pieces. Using the examples listed under materials, students will use Visible Thinking Strategies to examine the artwork. Have students work in pairs. Give each pair a copy of at least five different pieces of artwork. Have students ask each other:

  1. What is going on in this picture?
  2. What makes you say that?
  3. What more can you see?

If you are unfamiliar with Visible Thinking Strategies, you can find a guide to using this one in the classroom from Project Zero.

After students look at all the artwork, have them make a T-Chart listing how the pieces are similar and different.  See Student Resource Packet, p.8.
 
Extension: You can also have students look at how these art pieces were made. Here are several resources for them to explore:

Lesson Activity Five

Art Creation

Students create their own text-based art piece. Provide copies of the speeches, scissors, paper, markers and glue for students to work on their own art piece that connects the theme of the speech to modern society, culture, politics, history, etc. If your students have had little experience in art creation, try connecting with your school’s art teacher. This provides a great opportunity for cross-curricular instruction.

Additionally, you can find student produced examples of oratory art and art exhibition labels here.

Lesson Activity Six

Label Examples and Creation

Students will compare art exhibition labels. Using the examples listed in the materials section, have students work in pairs looking at a minimum of three different labels. For each label, they should list what they like and don’t like about the label. Working together they should come up with five rules for writing an effective label. See Student Resource Packet, p. 8

Students will write their own art exhibition label. Their label should connect the art piece to the historical speech explaining how the theme is still relevant today. See Student Resource Packet, p.9

Lesson Activity Seven

Gallery Walk

After students finished both their art piece and exhibition label, hang these around your classroom. Have students look at each one. After looking over the pieces, have a class discussion on what they liked about the pieces and what they learned from the process.

Assessment

Use the rubric on page nine in the Student Resource Packet to assess student learning.

What You Need

To complete the below activities you will need the following materials, in addition to markers/colored pencils, watercolor or acrylic paints, scissors, glue and paper.